I started with a Front Wrap Cross Carry (FWCC) photo tutorial because this is the most recommended beginner woven wrap carry. It is symmetric and relatively simple, and it also provides a great opportunity to practice strand-by-strand tightening, which I would argue is the most critical skill to hone when learning to wrap your baby.
This is my very first photo tutorial so please let me know how I can improve it to better assist you. Also, I hope you will join the Facebook group Stella's Chit Chat Corner, where I encourage you to post both your struggles and your successes. If you are having trouble, we can all help you troubleshoot, and if you are successful, you will help others gain the confidence to wrap.
Don't forget that wrapping is not easy, and you should expect to have some challenges as you begin. I remember being very frustrated when I first started, and even now, over three years later, I still struggle sometimes. But to me, wrapping is essentially an attainable super power, so it's well worth it.
Front Wrap Cross Carry Photo Tutorial:
Featured wrap: Bijou Wear Newport Marina size 7
Step 1: Find the middle marker on your woven wrap. Smile because you are confident. You can totally do this.

Step 2: Center the wrap on your chest using the middle marker as a guide. Keep smiling because this is super easy so far.

Step 3: Bring one tail of the wrap around your back and up over the opposite shoulder.

Step 4: Repeat step 3 with the other tail. The tails should cross and make an X across your back.

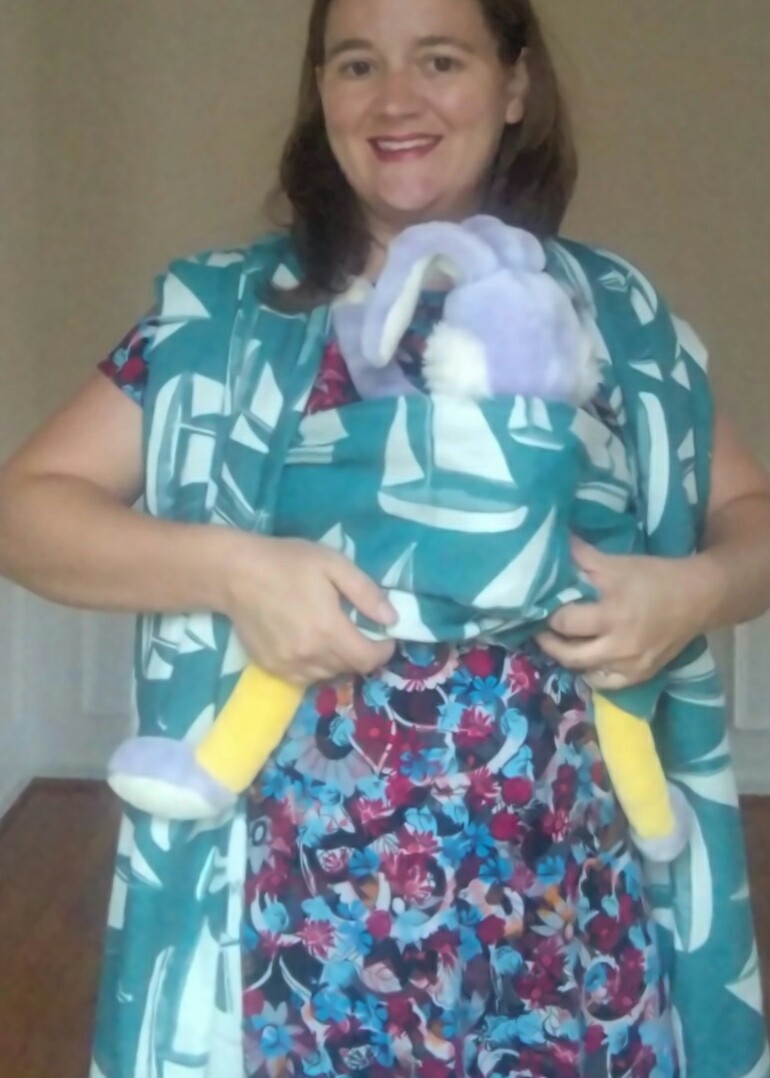
Step 5: Find the pouch you've created in the front.

Step 6: Look around for the toddler who agreed to be your helper but is now nowhere to be found.

Step 7: Put your baby high on your shoulder, and then guide baby into the pouch feet first. Keep one hand on baby to keep baby secure at all times.

Step 8: Pull the bottom of the wrap up and in between you and baby. Grimace a little because your baby is probably trying to pop that seat.

Step 9: Make sure the wrap goes from one of baby's knees to the other. Smile again. You got this.
Step 10: Tighten the tail of the wrap that is closest to your body first. Start by tightening the very top part of the tail.

Step 11: Gather more of the tail into your hand and tighten again. Grimace again as you question which life choices led to you spending an afternoon photographing yourself while wrapping a stuffed bunny.

Step 12: Continue to gather more of the wrap in your hand until you've tightened each strand.

Step 13: Repeat strand-by-strand tightening on the other side, which should be the tail on the outside of the X on your back.

Step 14: Cross the tails in the front under baby's bum.

Step 15: Bring both tails under baby's legs and tie a double knot in the back. If you are wrapping a small baby (or a stuffed bunny), it may be helpful to twist tails together a few times before bringing them to the back.

This is how it should look in the back.


Step 16: Take a selfie.
Optional: Edit out random stuff on the floor.
Optional: Edit out random stuff on the floor.

No comments:
Post a Comment